We're walking you through the installation process of a VWD ProMaster Half Slider sliding door van window and giving you the knowledge to conquer your van window install.
What you Need to Know About Bond-in Van Windows
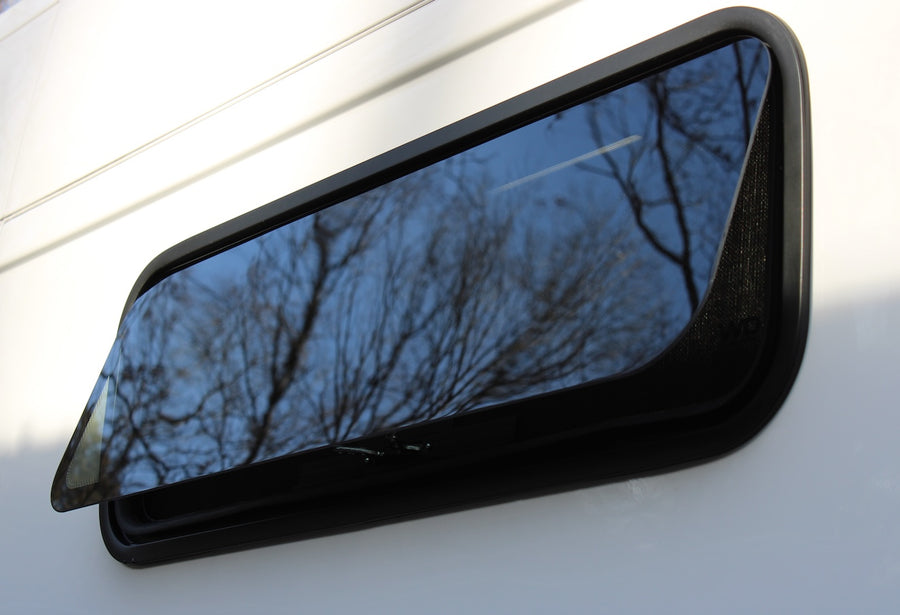
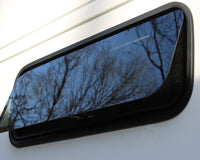
Bond-in windows require adhesive to install onto the outer van wall, within the interior factory window stamp. An OEM van window will completely rest within the interior van window stamp and adhere onto the exterior van window template.
For proper installation and seal you'll also need Urethane Primer and Trimlock Edge Gasket. Note: You won't need a trim gasket if you are installing a smaller bunk window.
A new window install will need to be prepped, outlined, and cut, while a replacement window install will require wire cutters and metal scraper to remove old bonded-in glass and adhesive.

Before You Start:
Confirm you've received the correct window, within specifications prior to cutting or attempting to install. Check the package labels and the label stickers on your window to confirm you've received the correct van window. Then check the measurement of your window with the measurement of the window template stamp.
Next, be sure to test the window for leaks using a water hose at low-pressure. Water should exit through weep holes within the bottom of your frame. Exact weep hole locations will vary based on the type of window, but the window will always need to be installed with weep holes at the bottom frame. You'll want to note the location of your weep holes to be sure adhesive isn't pushed inside, blocking the holes from draining properly.
If you do notice leaking within the inner frame or seals, please reach out to us for support!

What You'll Need to Install Your Van Window
Here's our complete list of van window install tools:
- Van Window
- Window Urethane Adhesive
- Window Urethane Primer
- Window Trimlock Edge Gasket
- Jigsaw or AirNibbler
- Thick Metal Jigsaw Blade
- Grinder or Oscillating Multi-Tool
- Plastic or Paper Cover
- Blue Tape
- Gloves
- Safety Glasses
- Long-sleeve Shirt (when cutting)
- Rubbing Alcohol
- Metal Primer Paint
- Metal File
- Face Mask
- 26 to 1 Caulk Gun
- Heavy Duty Window Glass Suction Holder
- Micro-fiber Rags
- Tape Measure
- Permanent Marker
- Water Hose
- Ladder
- Drill
- Level
- Box Knife

Preparation
Before you start cutting you'll need to prepare your van interior and exterior. Any metal shavings (that you're about to dust everywhere) will rust immediately on metal surfaces. Cover and tape your van surrounding area with a drop cloth and underneath the window outside the van to catch debris as it falls.
Be sure to put on safety gear prior to drilling or cutting into the metal.
Once you've covered your walls and put on your safety gear, you're ready to start cutting away the middle support using a grinder and drilling your corner outline holes.
To do this, use a grinder to cut away the top and bottom of the center support on the van's inside window template, and can cut away any adhesive that may still be holding the support onto the wall using a box knife.
Again from the inside of your van, you'll drill holes into the metal window stamp to outline the corners. This the templated layer of metal on your van wall that is slightly smaller compared to the exterior template. Drill 3-4 holes in each corner to dot the corner radius, outlining the curve for your outside cut, and drill one hole in the top and bottom center.


Next you'll use your newly drilled interior holes to outline the window stamp, using the holes as a guide on the outside of the van wall. Use a long level or straight edge and permanent marker to mark your lines. Note: the outer edge of each hole represents the outer edge line of the interior template.
With your outside template drawn you can now prep the area for cutting. Apply tape around your outline to protect your van wall and keep a firm border when cutting, and cover the underside of the window with paper or plastic cover to keep your van wall protected from metal shavings.


Ready, Set, Cut and Install!
Okay, you've prepped your area, cut away the center support, drilled your interior outline holes, made your exterior template outline, covered the van wall, and are ready with the proper tools to start cutting!
Start by cutting each of the window lengths before moving onto the corners. Cut the bottom first using your outline as a guide, then move on to the side lengths, and finally cut across the top. With all straight lines cut, use strips of blue tape to tape vertically down the window cutout and van wall, holding the window in place as you finish cutting the 4 rounded edges.


Once you've cut all four corner edges, gently pill back tape, pull away the window cutout revealing your new window hole, and celebrate!
Next up, you'll need to grab your metal file to clean away the rough metal edges of the cut window frame. Then use metal paint and a paint brush or permanent marker pen to cover over the raw metal edges to prevent rust. Finally, you can begin prepping the newly cut area for window installation by pilling off all the tape and clean up the area quickly by vacuuming away any residue inside and outside the van.


Now you're ready to install your TrimLock Edge Gasket around your cut out. You can find the appropriate trim lock for your van window install under "Frequently Bought Together" on our van window product pages for quick ordering or in our window accessories seen here.
Follow the edge of your cutout installing trimlock starting in the center and wrapping around the window to meet the beginning edge. Cut the length to lay seamlessly next to your starting point so no moisture can enter the window and create rust or mildew.


Before you apply adhesive or primer be sure test fit your window for proper fitment.
To check fitment, place the window in the cut hole and have a helper check the inside and outside frame to be sure the window is fitting properly within the cutout and contours along the outer van wall.
Once you've confirmed the van window fits perfectly, clean the van wall around your window cutout with alcohol and let it dry. Then use your Urethane Primer to trace a line around the cutout approximately 1.5" away from the cut for large windows and 1" for bunk windows.
Add lines of tape to the top and bottom of the window and prep them to be pulled across the window once installed while your primer is drying. You should let the primer dry for at least ten minutes before applying urethane adhesive.
CRL Urethane Adhesive will include a nozzle with the appropriate "V" notch for applying the bead. Follow your Primer line with a smooth 1/2" tall bead around the window keeping your line 1.5" or 1" away from the cut, respectively, using a 26 to 1 caulk gun.


With a helper, pick up your new window using heavy duty suction cups and place the window into the window template.
It's best to move the window as little as possible once installed, so start by angling the top of the window inward and align it with your top template frame. Make sure both sides of the van window are aligned with the outer edge of the van window template. Then press the top portion of the glass into place and follow the window along the side to the bottom, pressing gently against the adhesive.

Grab the tape and lay it across your newly installed window. This will keep your window in place as it dries and help hold it still while you finish checking the edges are secure. Let your window cure for at least 3 hours before driving the van.
Be sure to test for leaks again once your adhesive is dried by simulating rain on the outside window pane using low-pressure water. If you're experiencing a leak, double check your van window's weep holes are not clogged with adhesive or reach out to our support team for help.
Celebrate your new window is successfully installed!

Summary
There's no better feeling than taking on a DIY install and completing it beautifully, and with the right prep work and support you'll be able to install your new van window in a single day, feeling completely in control and confident.
Go slow, read everything more then once, ask the obvious questions, and know window installs happen everyday -- for some of our installer customers multiple times a day.
Here's a quick installation recap:
- Inspect your window: double-check sticker label is correct, check measurements, and reenact rain with a hose to check for leaks.
- Prep the area with tape and drop clothes.
- Put on your safety gear.
- Using a grinder, cut away the center support at top and bottom, and remove from window template.
- Drill template holes on the inside van window stamp in corner edges and in top/bottom center.
- Clean up any debris.
- From the outside and with a level or straight edge, draw your outline, connecting the drilled holes.
- Tape and cover your van wall to prevent rust.
- Begin cutting along the top, bottom, and sides.
- Vertically tape the cut metal to hold in place.
- Finish cutting the four rounded corners.
- Pull away metal cutout.
- Vacuum area, making sure no residue remains.
- Using your metal file, file the cut edges to remove rough metal and smooth window cutout edge.
- Paint raw metal.
- Add Trimlock gasket around window cutout, be sure to start and finish in the middle, bottom portion of the window cutout. Do not leave a gap.
- Clean around cutout using rubbing alcohol and microfiber towel.
- Apply Urethane Primer 1/5" (1" for bunk windows) away from cutout around entire window cutout.
- Let primer dry for at least 10 minutes.
- Add and prep vertical tape lines above and below the cutout to lay across window once installed.
- Apply Urethane Adhesive 1/5" (1" for bunk windows) away from cut edge around entire window cutout.
- Prepare to install quickly using heavy duty suction cups and helper.
- Angle the top half of the window into position, line up outer glass edged to fit within the template, and press window against adhesive.
- Support window onto wall using vertical blue tape lines.
- Let adhesive cure for 3 hours minimum.
- Use a pipe cleaner to check your weep holes are open and unclogged.
- Test for leaks after adhesive has dried.


2 comments
Brianna
For this installation our team used CRL Urethane Adhesive which has recently been discontinued.
We now offer SikaFlex P2G and recommend Urethane adhesives for window installation. The link in the article has been updated as well. Thanks for your comment!
lexiryman@hotmail.com
What type of CRL Urethane adhesive did you use? I went to your link and it looks like it may be m from your shop.