Get 5% off all orders over 5K with 5OFF5K + Get 10% off all orders over 10K with 10OFF10K

Camper Vans Part 6: Adding Windows

Camper Vans Part 6: Adding Windows

By Greg Keith  •   5 minute read

Sprinter van before adding rear windows

Want to build a camper van? In this series of Campervan HQ blog posts, we'll discuss doing just that. For a more detailed discussion, see my 378-page Sprinter RV Conversion Sourcebook.

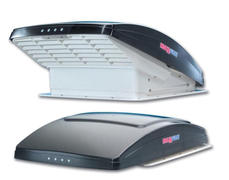
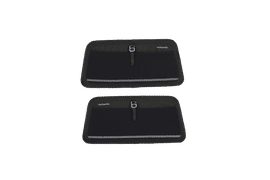
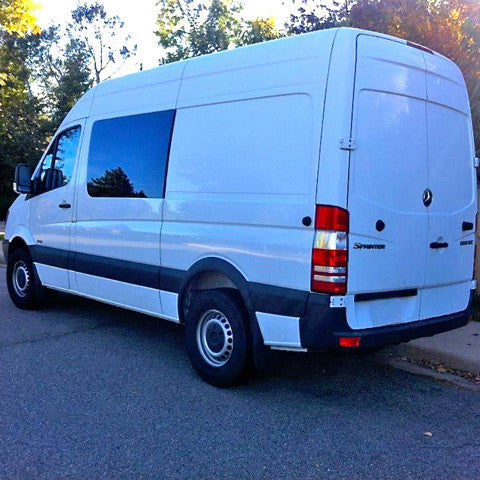
Now that you've started your build by getting the interior of the van ready for your camper van conversion, now is an excellent time to add openings for windows, skylights and vents. Terrifying as it is to cut into the metal of your expensive new van with a saw, it's necessary, and it's really not that difficult if you take some care while planning and making the cuts.


IMPORTANT NOTES:

1) If you're installing bonded (glue-in) windows, do not attempt to install your new van windows in an unheated space where nighttime temperatures fall near or below 40°F. Either install the windows in a heated space, or wait until temperatures are warm enough for the adhesive to cure properly. The van, glass and adhesive must ideally all be at the same temperature.

2) Any metal shavings must be collected and removed from contact with the van's sheet metal exterior or interior immediately. Any metal shavings will start rusting rapidly (within 24 hours given any moisture present), which may permanently damage your van's paintwork.
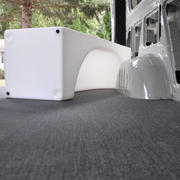
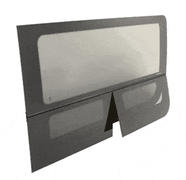
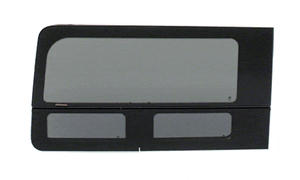
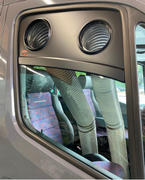
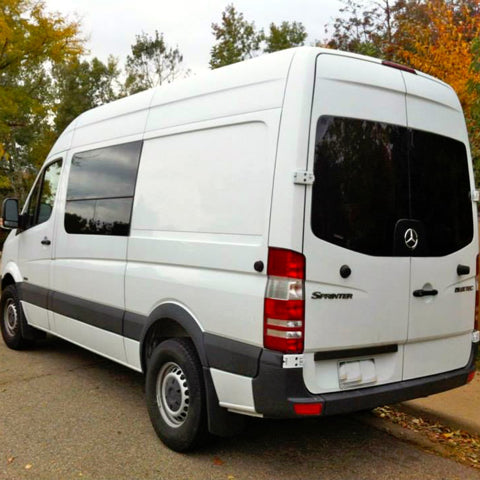
Adding Van Windows

There are several tools you might use to cut the openings. Warning: before using any of these tools, make sure you're wearing gloves, eye protection and hearing protection! These tools all produce a surprising amount of tiny metal shavings and lots of noise:

  • Jigsaw - A jigsaw with a many-toothed metal blade (rather than a coarser-toothed wood blade) can work well for cutting window openings. However, because of the oscillating motion of the blade, it tends to hammer against the metal (set to to "smooth" if your jigsaw has that option), so you need to take special care to use plenty of tape all around your cut lines, both on the exterior (to prevent paint scratching) and on the interior (to prevent lots of small, sharp metal flakes from being scattered everywhere).
  • Air Nibblers - Air nibblers are another excellent tool for cutting window openings. They can typically cut up to 14-gauge steel easily, produce a lot less metal trimmings, and vibrate less than a jigsaw. However, they can be a little cumbersome to handle, depending on what you're cutting.
  • Center-Blade Shear - Makita, DeWalt and Milwaukee all make center-blade shears which work well for cutting openings for windows and vents on your camper van. This produces less vibration than a jigsaw and results in a very accurate cut if used carefully, though just as many trimmings.

How to add van windows

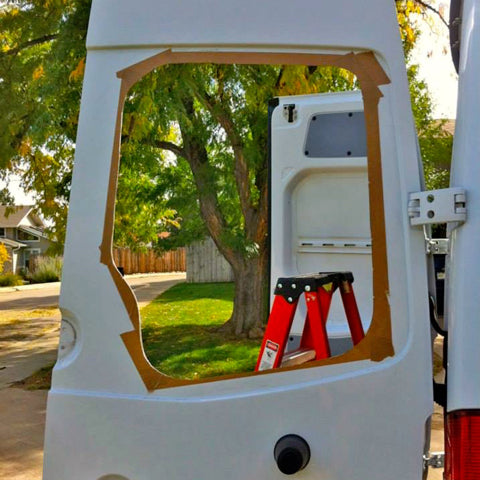
1. If the exact shape is not clear, you may first need to first drill pilot holes or tap outlines with a punch. When you've cut the openings, make sure that you dab the edges of the cut metal with rustproofing paint. You can use a small sponge-like dab tool rather than a brush.

Masking Sprinter van rear door before cutting

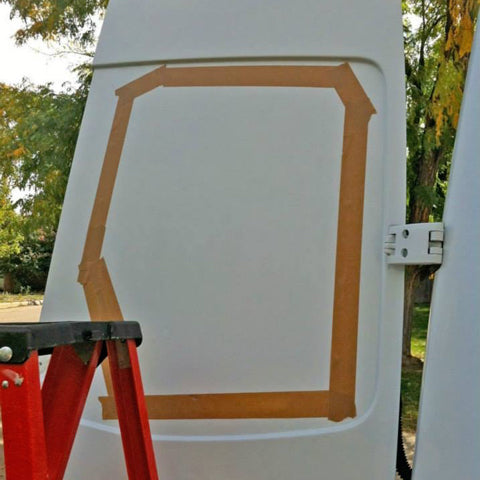
2. Depending on the type of window you're installing, you may have both an exterior seal created with urethane adhesive and an inner trim ring:

  • For bonded windows - If the window is a new install in a new opening, you will need to prime both the glass where the glue bead will be attached, and the body sheet metal where the adhesive will go (for example, with CRL Powr-Bond Primer. Note that primer vapors are explosive and dangerous, so use primer in a well-ventilated area). Shake primer for one minute before use, apply with clean dauber/brush, and let dry for 10 minutes.


  • For both bonded and clamp-in windows - If the window is a new install in an existing opening where a window was mounted before, be sure to clean off all the old urethane adhesive with a blade, working carefully to ensure you don't cut too deeply and scratch the van's body paint. Removing as much of the old urethane as possible will help ensure a good seal for your new window.


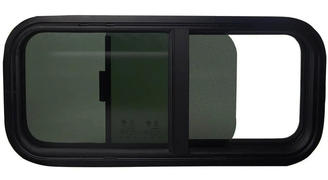
  • For clamp-in windows - Unscrew the inner trim ring from the window, using either hand tools or very carefully with power tools, making sure not to strip the trim ring screws.
Old urethane outline on Sprinter window opening

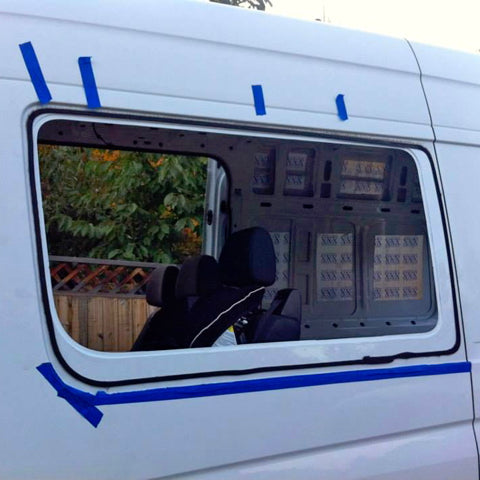
3. Fit the window in place in the opening to check for correct fit. If all looks right, pop the window out again.

4. For bonded windows - Prime the area where the adhesive will go, then lay a thick bead of urethane adhesive all the way around the window opening. CRL Powr-Bond Urethane Adhesive is a good choice for window glue.

Almost finished cutting window opening in Sprinter van rear door

5. Carefully position the van window in the opening, then press it into place against the adhesive. Make sure all window edges are at a uniform height from the sheet metal of the van body.

Freshly cut window opening for Mercedes Sprinter van rear door window

6. For clamp-in windows - Once the van window is in the exact position you want, mount the inner trim ring back onto the inside of the window and secure it in place with the trim ring screws. On many windows, the screws on the inner trim ring are easy to strip, so either hand-tighten these screws or use power tools very carefully. Instead of fully tightening each screw initially, tighten each screw partially, moving clockwise around the window. Then do a second round of tightening until all are sufficiently tight without stripping the screws. As you go, check the position of the window edges, and adjust the positioning a little if necessary.

7. If the window positioning is now correct:

  • For bonded windows - Let the adhesive cure without moving the van for 4-48 hours. Curing time differs drastically depending on temperature and humidity. A rough baseline: 3 hours to full cure at 73°F (23°C) and 45% relative humidity.

  • For clamp-in windows - Your install is done. Check for leaks as described in the next step. 

Finished rear Sprinter van windows

8. When the window glue has cured (for bonded windows) or 24 hours have passed and the exterior compression ring has flattened (for clamp-in windows), gently hose the closed window from outside with water. Check the inside carefully for any leaks. If you find leaks, then on a clamp-style window you can:

  • Check the exterior compression ring flange around the outside of the window. Sometimes a portion of the exterior compression ring flange can become compressed or distorted and thus not seal the exterior properly. If this happens, loosen the trim ring screws, correct the position of the exterior compression ring flange, then tighten the inner trim ring screws again.

  • Tighten the trim ring screws further. Clamp-style windows may need two rounds of tightening to get the external compression ring fully sealed against the van exterior. Just make sure you don't strip the trim ring screws when re-tightening!


Previous Next
Camper Vans Part 6: Adding Windows

Camper Vans Part 6: Adding Windows

Greg Keith

Your cart

Your cart is empty

Start shopping

Subtotal:$ 000 USD

Promoted products

48V POWER KITS

SHOP NOW
  • Product Reviews
  • Site Reviews
07/25/2025
Aladin K.
United States
Everything fit perfectly and i can feel the difference in the van during hot days. Ac couldnt keep up before insulation
3M™ Thinsulate™ Van Insulation Kit for Ford Transit
07/23/2025
CHRIS S.
United States
The power kit is not installed yet. But I want to say that Holly at Campervan HQ Support was FANTASTIC in helping me with an issue. Ecoflow sent me one of the components directly and they did not get it right. Holly quickly got it straightened out.
EcoFlow 5 kVA Power Kit - Gen 2
07/21/2025
Marit F.
United States
So much better than the original
EcoFlow LFP Battery Power Cable (2.5m)
07/18/2025
Sven G.
United States
I used these for several van build outs and there is pros and cons. The pros more speeds, better in rain and rainy hot locations! But the older simple fans pull more air. So you make a compromise between more air flow and or no air flow if it comes down hard.
MaxxAir MaxxFan Deluxe RV Roof Vent Model 7000K (With Remote)
07/18/2025
James N.
United States
I’m still working on the installation but nice tank. Fits very well. I need to make some brackets to hold it in place and then make the cabinets for the kitchen of the van.
Northwest Conversions 36 Gallon Water Tank SP-C-36
07/16/2025
Ray E.
United States
Best available price. Fast shipping.
MaxxAir MaxxFan Deluxe RV Roof Vent Model 7500K (Smoke, With Remote)
07/14/2025
Scott B.
United States
The window fit perfectly in my van, plenty of coverage with the trim. Used a jigsaw and was smooth. Did need to cut the trim down in length so it would fit property in the groove of the window. Used the window box to make a template- quite tricky to trace it properly. All in all 3 hours and it was...The window fit perfectly in my van, plenty of coverage with the trim. Used a jigsaw and was smooth. Did need to cut the trim down in length so it would fit property in the groove of the window. Used the window box to make a template- quite tricky to trace it properly. All in all 3 hours and it was installed. 3 weeks and it’s waterproof and worked great
CRL Mercedes Sprinter Passenger Side Sliding Door T-Vent Window (FW625R)
07/10/2025
Guillermo Q.
United States
it was Crazy to put on Ones you got going it went well for us 😃 only Broke 1 Drill Bid and look out for the Double Steal area that’s where it can go bad
VanEssential 2007+ Mercedes Sprinter Rear Door Storage Panels
07/06/2025
Steve l.
United States
I read the online installation comments and found them to be accurate and quite useful. Very nice product.
Mercedes Metris Scopema Seat Swivels (2015-2023)
07/03/2025
Craig H.
United States
I don't have it installed yet.
Lonseal Flooring - Loneco Linen Topseal
06/25/2025
jerome b.
United States
As advertised. Great price. Fast shipping with updates.
MaxxAir MaxxFan 7500K Roof Vent Fan Install Kit
06/11/2025
Samantha B.
United States
Easy to install!
Ford Transit Scopema Seat Swivel (2013-2023)
06/11/2025
Elizabeth D.
United States
I love this company. Their staff is always helpful and informative. I got the item within a good ETA. All as described/ordered
Northwest Conversions 36 Gallon Water Tank SP-C-36
06/11/2025
David K.
United States
Fairly easy installation great product, but my lid rattles when I go down the road and I can hear wind noise through it, wasn’t aware that you could hear wind noise.
MaxxAir MaxxFan 7500K Roof Vent Fan Install Kit
06/11/2025
David K.
United States
Perfect fit. Numbering the pieces and providing a number diagram genius even I could do it. Great company.
3M™ Thinsulate™ Van Insulation Kit for RAM ProMaster - High Roof
06/09/2025
Glen J.
United States
Arrived timely.. Awaiting install at this point! Cant wait!
3.6 kW EcoFlow Power Kit (10 kWh)
06/08/2025
Tim H.
United States
Easy installation on a 2015 sprinter van . Very happy with my purchase
Northwest Conversions 22 Gallon Sprinter Undercarriage Water Tank SP-UC-22
06/05/2025
Paul A.
United States
It should come with a cutting out template.
CRL Universal Van Awning Window (AW1033)
06/04/2025
Steven W.
United States
We have not had a chance yet to use the awning, but the install was smooth and looks great on our Sprinter.
Fiamma F45S 350 RV Awning (11'6'')
06/03/2025
William J.
United States
Well made, easy to use.
VanEssential Ford Transit Rear Door Window Covers (Pair)
06/03/2025
William J.
United States
Well made, easy to use!
VanEssential Ford Transit Rear Door Window Covers (Pair)
06/03/2025
Deborah S.
United States
We haven't installed them yet, but they were well packed, arrived in reasonable time, seem good quality, intact, and all inclusive.
MaxxAir MaxxFan 7500K Roof Vent Fan Install Kit
06/02/2025
Scott S.
United States
terrible, poor communication after order was placed, 7 days without an update on when the order will be shipped or estimated delivery while receiving annoying multiple other emails from CamperHQ for marketing and surveys. I finally received notice the same day it was available for pick up I will be...terrible, poor communication after order was placed, 7 days without an update on when the order will be shipped or estimated delivery while receiving annoying multiple other emails from CamperHQ for marketing and surveys. I finally received notice the same day it was available for pick up I will be ordering additional widows and other camper build items from someone other than Campervan HQ
CRL Ford Transit 130/148"WB Driver Side Forward Vented Window (FW293L)
05/29/2025
Lester H.
United States
This item works with the new Ecoflow Wave 3.
Terrawagen EcoFlow Wave 2 Window Vent
05/25/2025
Sevriano
United States
Quality fresh water tank. Very heavy duty
Northwest Conversions 28 Gallon ProMaster Wheel Well Water Tank PM-C-28
05/21/2025
Josee L.
United States
Very happy with the Maxfan 5100k The best :)
MaxxAir MaxxFan Deluxe RV Roof Vent Model 5100K (White)
05/21/2025
Tiara
United States
The windows are great! The quality and the ease of opening.. and of course the size is what is the best feature. In my opinion.
VWD Universal Fit Overlander Van Bunk Window O.D 36-3/4" x 13-1/8" (OVR3511)
05/18/2025
Julie B.
United States
I one right away and had o wait for the other but great quality.
Northwest Conversions 25 Gallon Transit Wheel Well Water Tank TR-C-24
05/17/2025
Dawn M.
United States
These are exactly what we needed for some extra storage. Love them!
VanEssential 2007+ Mercedes Sprinter Rear Door Storage Panels
05/14/2025
Ruben F.
United States
Great Product Easy to apply
Lonmarine Wood Flooring
REVIEWS